Livestock Photography 101: Capturing Your Genetics for Maximum Impact
Learn how to photograph and film your livestock for maximum buyer impact. Practical tips on lighting, angles, smartphone techniques, and video that any breeder can apply in the paddock today.
Livestock Photography 101: Capturing Your Genetics for Maximum Impact
How your animals look online directly shapes how buyers perceive them. A well-photographed bull can stop a buyer mid-scroll. A poorly lit, awkwardly angled snapshot of the same animal gets swiped past without a second thought.
For sale catalogues and professional marketing, hiring an experienced livestock photographer is always worth the investment. But between catalogue shoots, you’re still posting to social media, sending mid-season updates, recording paddock assessments, and sharing photos with potential buyers. Those day-to-day images matter too - and most of them are taken on a smartphone, in whatever conditions the paddock offers.
This guide covers the fundamentals of livestock photography and video that any breeder can apply immediately, using the gear already in their pocket.
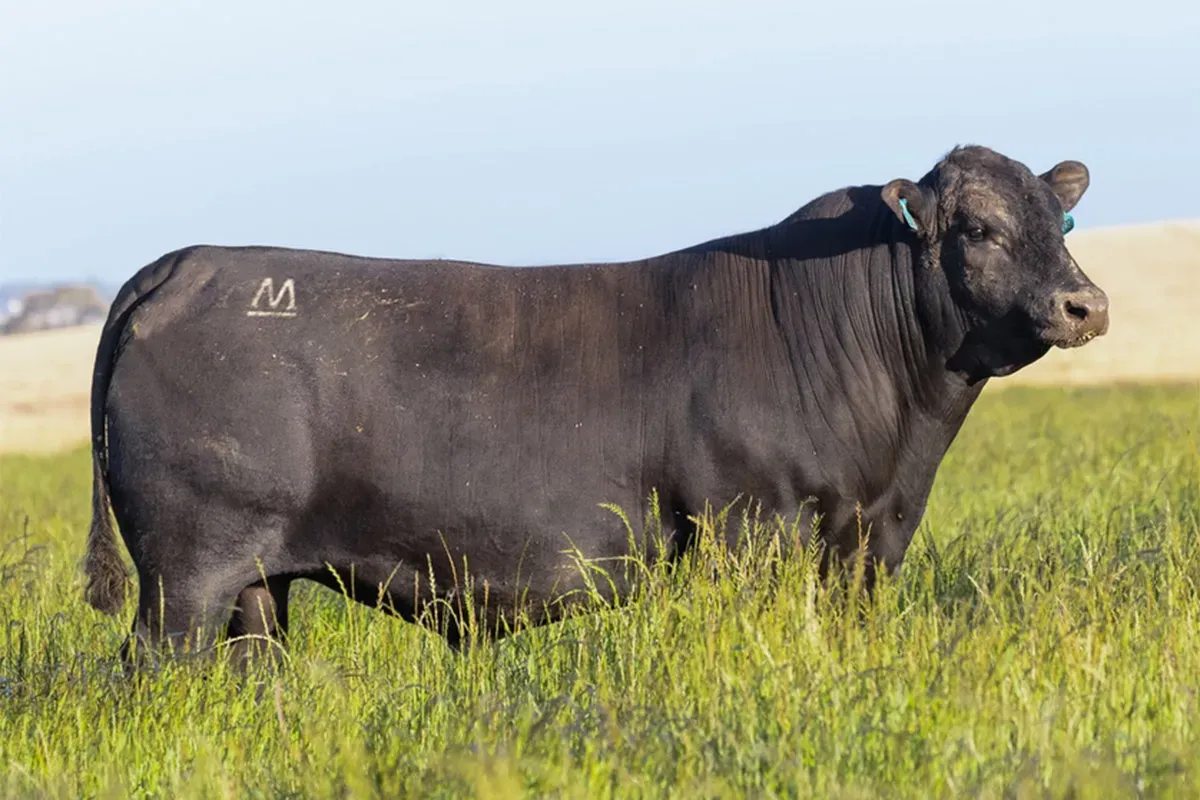
 A strong photo makes all the difference - clean background, good light, and correct camera height let the animal speak for itself.
Lighting: The Single Biggest Factor
Lighting makes or breaks a livestock photo more than any other element. The same animal can look like a sale-topper or a cull candidate depending on when and how it’s lit.
The Golden Hour Advantage
Shoot early morning or late afternoon. The hour after sunrise and the hour before sunset - often called “golden hour” - produces warm, soft light that flatters conformation and creates depth.
Why it works:
- Low-angle sunlight wraps around the animal, revealing muscle definition, body depth, and structural detail.
- Shadows are soft and directional, adding dimension without hiding faults or creating harsh contrasts.
- Warm tones enhance coat colour, making reds richer, blacks deeper, and whites cleaner.
Avoiding Midday Light
The worst time to photograph livestock is between 11am and 2pm. Direct overhead sun creates problems that no amount of editing can fix:
- Harsh shadows under the belly and brisket that make animals look shallow-bodied.
- Loss of topline definition as light flattens the back.
- Squinting animals that look uncomfortable rather than alert.
- High contrast that blows out light-coloured areas while underexposing dark areas - particularly problematic for black cattle.
If you absolutely must shoot midday, find open shade - under a tree line or the shadow of a building - where the light is diffused. Avoid dappled shade under individual trees, which creates uneven light patches across the animal.
Overcast Days: The Hidden Advantage
Don’t dismiss overcast conditions. A uniformly cloudy sky acts as a giant diffuser:
- Even lighting with no harsh shadows - excellent for accurate conformation assessment.
- True colour representation without warm or cool casts.
- No squinting, so animals present with alert, natural expressions.
Many experienced livestock photographers actually prefer light overcast conditions to direct sun. If the clouds roll in, don’t put the camera away - get shooting.
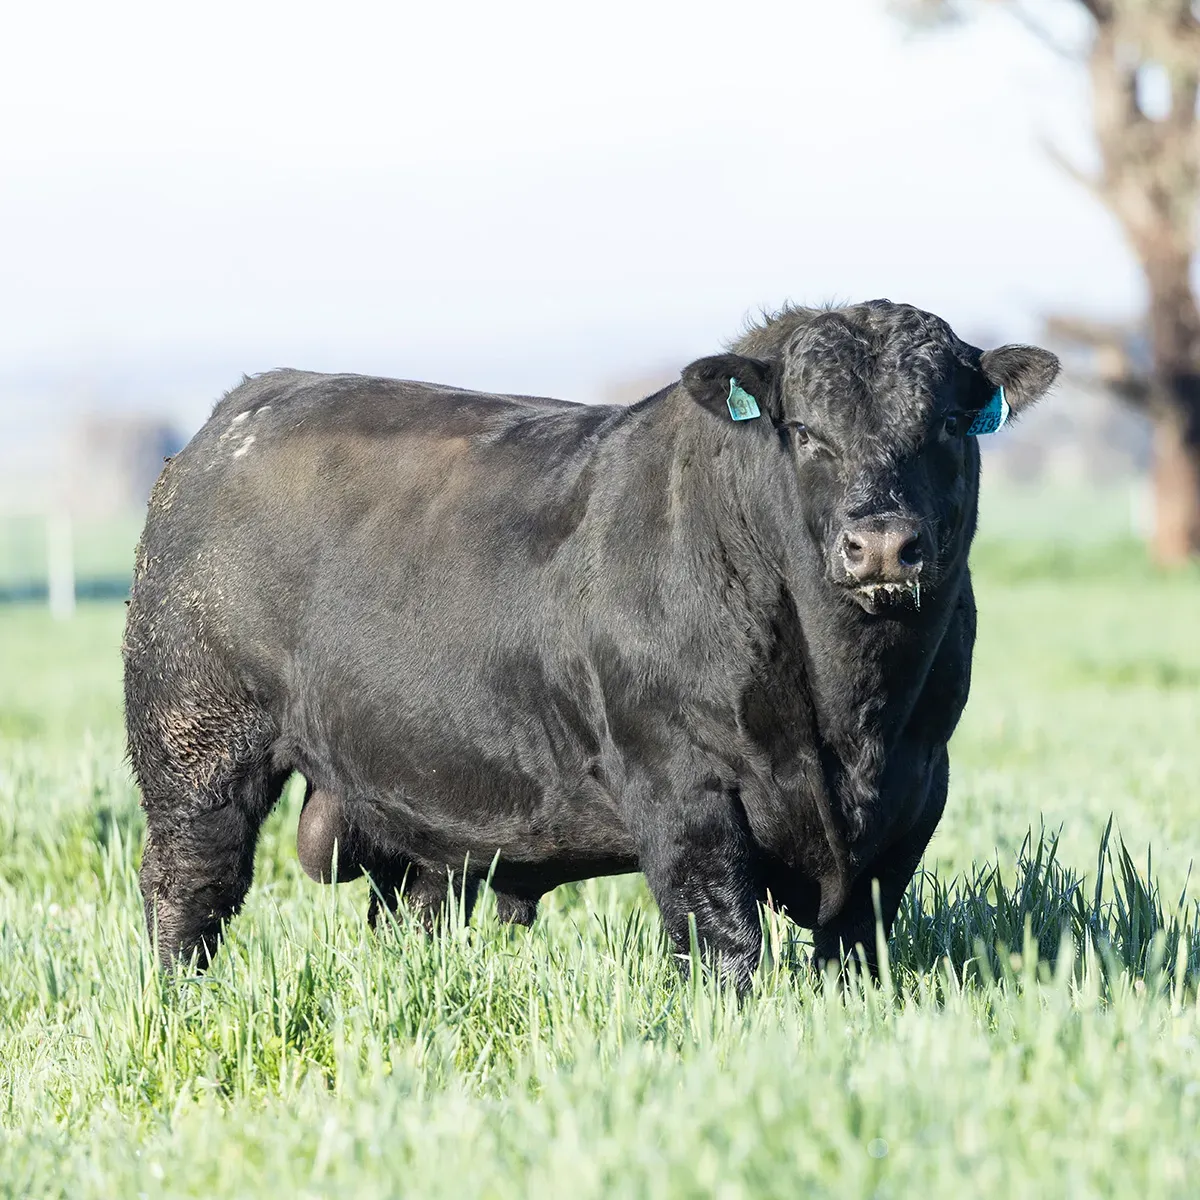
 Soft, directional light reveals muscle definition and true coat colour without harsh shadows.
Light Direction
Position yourself so sunlight comes from behind you or slightly to one side. The light should fall on the animal’s profile side, not behind it.
- Front-lit: Sun behind you, illuminating the animal evenly. Safe, reliable, sometimes flat.
- Side-lit: Sun from one side, creating depth and muscle definition. Often the most flattering.
- Back-lit: Sun behind the animal. Creates silhouettes and halo effects. Avoid for conformation photos.
Positioning and Angles: Setting Animals Up Right
Professional livestock photography follows conventions that exist for good reason - they allow fair assessment of structure, balance, and conformation.
The Standard Side Profile
The side-on profile is the industry standard for a reason. It shows:
- Topline and underline
- Shoulder set and angulation
- Depth of body and spring of rib
- Hindquarter length and muscling
- Leg structure and set
How to set up for a side profile:
- Position the animal on flat, even ground. Slopes distort proportions - an animal standing uphill looks front-heavy; downhill looks rear-heavy.
- Square the animal up. All four feet visible, legs reasonably square. The near-side front and rear legs should be slightly forward of the far-side legs so all four feet are visible.
- Head up and alert. Have a handler or second person get the animal’s attention with feed, noise, or movement. An alert head carriage shows the neck and front end to advantage.
- Tail relaxed or slightly away. Not tucked between the legs or kinked awkwardly.
Camera Height: The Critical Detail
Your camera should be at the animal’s midline height - roughly level with the centre of the body.
This is where most paddock photos go wrong:
- Too high (standing upright, shooting down): Makes the animal look short-legged, shallow-bodied, and smaller than it is. This is the most common mistake.
- Too low (ground level): Distorts the underline, exaggerates leg length, and can make the belly look tucked.
- Just right (knee to hip height): Accurate proportions that represent the animal honestly.
For cattle, this usually means crouching or kneeling. For sheep, you may need to get lower still. It’s uncomfortable, but the difference is dramatic.
Distance and Framing
Stand far enough back that the animal fills approximately 70-80% of the frame. Too close and you get lens distortion - the nearest body part (usually the head or shoulder) looks oversized relative to the rest. Too far and the animal gets lost in the background.
- Leave some space around the animal. A little background context is fine. You can always crop tighter later, but you can’t add back what you cut off.
- Keep the animal centred or slightly off-centre. Avoid cutting off feet, ears, or tail tips.
- Check the background. A clean, uncluttered background keeps focus on the animal. Fence posts, water troughs, machinery, and other animals in the background are distracting.
Multiple Angles
For social media and buyer enquiries, go beyond the side profile:
- Three-quarter front: Shows width, chest, and head character. Stand at roughly 45 degrees to the animal’s front.
- Rear view: Useful for showing hindquarter width and muscling. Stand directly behind, camera at rump height.
- Action shots: Animal walking naturally, showing movement and temperament. Less formal but adds personality.
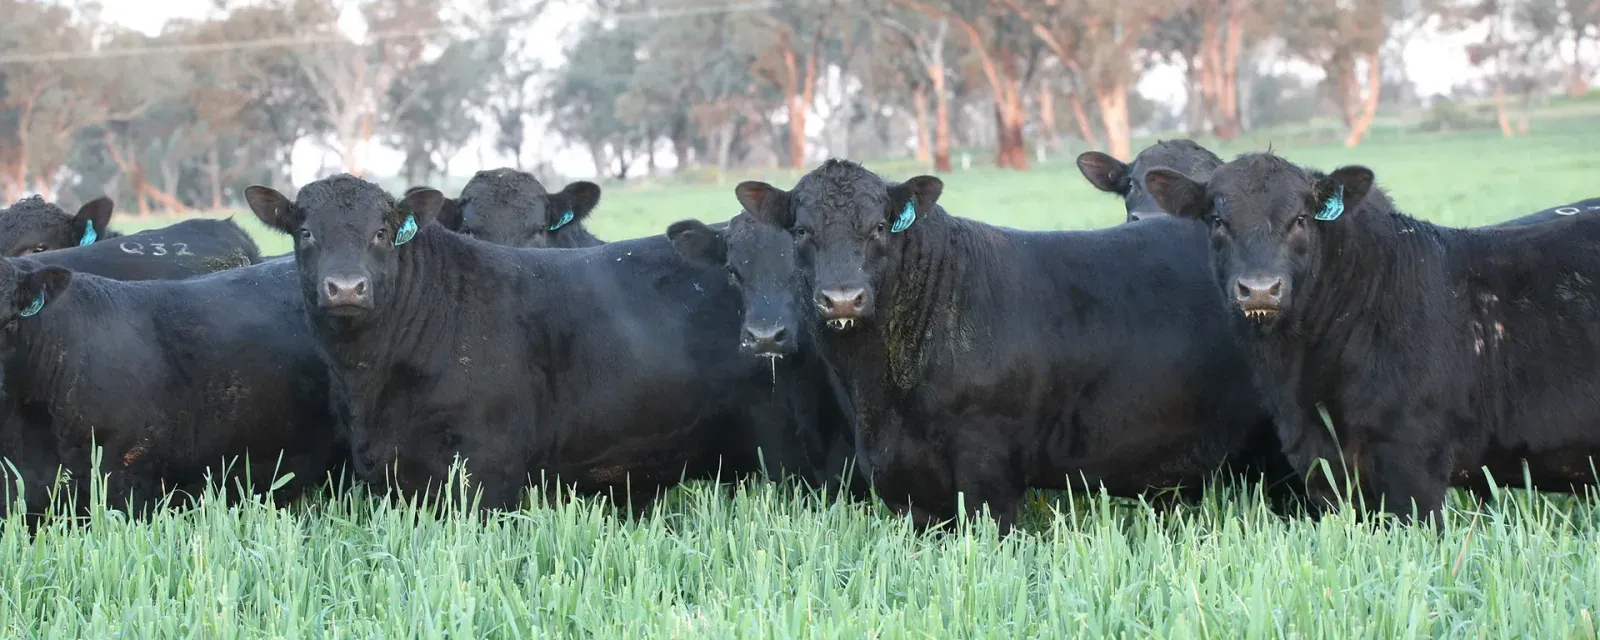
 Camera at midline height, animal squared up on flat ground, with space around the frame - the fundamentals done right.
Smartphone Mastery: Getting Professional Results from Your Pocket
You won’t always have a DSLR. In fact, most of your photos will come from whatever phone you’re carrying. Modern smartphones are remarkably capable - the limitation is usually technique, not technology.
Camera Settings
Use the standard camera mode. Avoid portrait mode for livestock - the artificial background blur often cuts into the animal’s outline, blurring ears, tails, or legs that the software mistakes for background.
Turn on the grid. Most phone cameras have an optional grid overlay. Use it to keep horizons level and animals centred.
Lock focus and exposure. Tap and hold on the animal to lock focus. On most phones, you can then slide up or down to adjust exposure (brightness). Lock these before shooting so the camera doesn’t refocus or readjust mid-shot.
Avoid digital zoom. Pinch-to-zoom on a smartphone degrades image quality significantly. Instead, walk closer. If you can’t get closer, take the photo wide and crop later - you’ll retain more detail.
Practical Tips for the Paddock
Clean your lens. This sounds obvious, but a pocket-carried phone collects dust, fingerprints, and smudges constantly. A quick wipe on your shirt before shooting makes a visible difference.
Hold steady. Brace your elbows against your body, hold the phone with both hands, and exhale before tapping the shutter. Even small movement creates softness, especially in lower light.
Take multiple shots. Animals move. Ears flick, heads drop, legs shift. Take five or ten frames and choose the best one later. Storage is free; the perfect moment isn’t.
Shoot in landscape orientation. Horizontal frames suit livestock conformation far better than vertical. Side profiles especially need the width that landscape orientation provides.
Use burst mode for movement. If you’re capturing an animal walking or a mob moving, hold the shutter button for burst mode. You’ll capture dozens of frames per second and can select the best later.
Editing: Less Is More
Basic editing can lift a good photo to a great one. Most phone editing tools are more than sufficient:
- Crop and straighten. Fix the composition and level the horizon.
- Brightness and contrast. Lift shadows slightly if the animal is too dark. Add a touch of contrast for definition.
- Saturation: A very small boost can enhance coat colour. Overdo it and animals look artificial.
- Sharpness: A slight increase can help, particularly if there’s minor softness.
Avoid filters. Instagram-style filters distort colour, add artificial tones, and undermine credibility. Buyers want to see what the animal actually looks like.
Video Best Practices
Video is increasingly expected in livestock marketing. Buyers want to see movement, temperament, and structural soundness that photos alone can’t convey.
Keep It Short - And Ruthlessly Selective
Aim for 10-30 seconds of your absolute best footage per animal. A punchy 10-second clip of an animal at its peak - perfect light, clean movement, strong presence - will always outperform a 60-second video padded with average moments.
Show the animal at its best and nothing else. Every second of footage should earn its place. If a walk-past was slightly rushed, or the animal dropped its head mid-shot, cut it. Buyers form impressions in the first few seconds - make sure those seconds are flawless.
What to include:
- A clean walk past the camera showing natural movement
- A standing side profile with the animal alert and set up well
- Head and front-end detail if the angle flatters the animal
What to leave out:
- Footage where the animal is unsettled, distracted, or poorly positioned
- Shaky or poorly lit clips, even if the animal looks good
- Repetitive angles that don’t add new information
Buyers won’t watch three-minute videos of a single animal, and they’ll skip past a 30-second clip that loses their attention halfway through. Respect their time with only your strongest footage and they’ll watch more of your content.
Stability Is Everything
Shaky footage looks unprofessional and is physically uncomfortable to watch.
Smartphone stabilisation tips:
- Use both hands and tuck your elbows against your body.
- Walk smoothly if tracking a moving animal. Take slow, deliberate steps - avoid bouncing.
- Stand still when possible. Let the animal move through the frame rather than chasing it with the camera.
- Use a fence post or rail as a brace if available. Lean the phone hand against a solid object for instant stabilisation.
- Consider a basic gimbal. Smartphone gimbals cost $100-200 and eliminate shake almost entirely. If you shoot video regularly, it’s a worthwhile investment.
Focus on Natural Movement
The most valuable livestock video shows the animal moving naturally:
- Walking on flat ground reveals structural soundness, stride length, and movement quality.
- Natural behaviour - grazing, interacting with the mob - shows temperament.
- Avoid rushed or stressed movement. An animal being chased by dogs or hurried through a race doesn’t present well.
Set up a situation where the animal walks calmly past the camera. A laneway, a fenceline, or a quiet corner of the paddock works. Have someone walk the animal or let it move naturally.
Framing for Video
- Landscape orientation only. Vertical video of livestock is almost never useful.
- Give the animal room to walk into. If it’s moving left to right, frame it with more space on the right side.
- Start recording before the animal enters frame and stop after it exits. This gives you clean edit points.
- Avoid panning back and forth. Pick your position, frame up, and let the animal move through.
Sound Considerations
Wind is the enemy of paddock video. Wind noise across a smartphone microphone drowns out everything else.
If conditions are windy, plan to mute the audio or add music later. If you’re narrating to camera (describing an animal’s attributes), cup your hand around the microphone or turn your back to the wind.
For social media, many viewers watch with sound off anyway. Your video should tell the story visually without requiring audio.
Building a Photo and Video Library
Consistent documentation of your animals creates a valuable library over time.
Photograph Regularly
Don’t limit photography to catalogue season. Regular photos throughout the year capture:
- Growth and development - weaner through to maturity
- Seasonal variation - coat condition, body score changes
- Progeny comparisons - showing sire influence across the drop
- Property and environment - the country your genetics are bred for
Organise as You Go
A phone full of unlabelled livestock photos is nearly useless. Develop a simple system:
- Name or tag photos with animal identification when you take them.
- Use a consistent folder structure - by animal, by date, or by mob.
- Back up regularly. Phones get dropped in troughs, sat on in utes, and lost in paddocks.
Frisbee’s animal records let you attach photos and videos directly to individual animal profiles, so your visual documentation stays linked to the data that gives it context - pedigree, EBVs, health records, and sale history. No more searching through camera rolls trying to match a photo to an animal.
Build a Content Bank
Every decent photo you take is potential marketing content:
- Social media posts - paddock shots, mob photos, individual features
- Email campaigns - hero images, offering highlights
- Website content - gallery pages, breed program visuals
- Catalogue assets - supplementary images beyond the formal catalogue shoot
Shoot more than you think you need. You’ll always find uses for quality images.
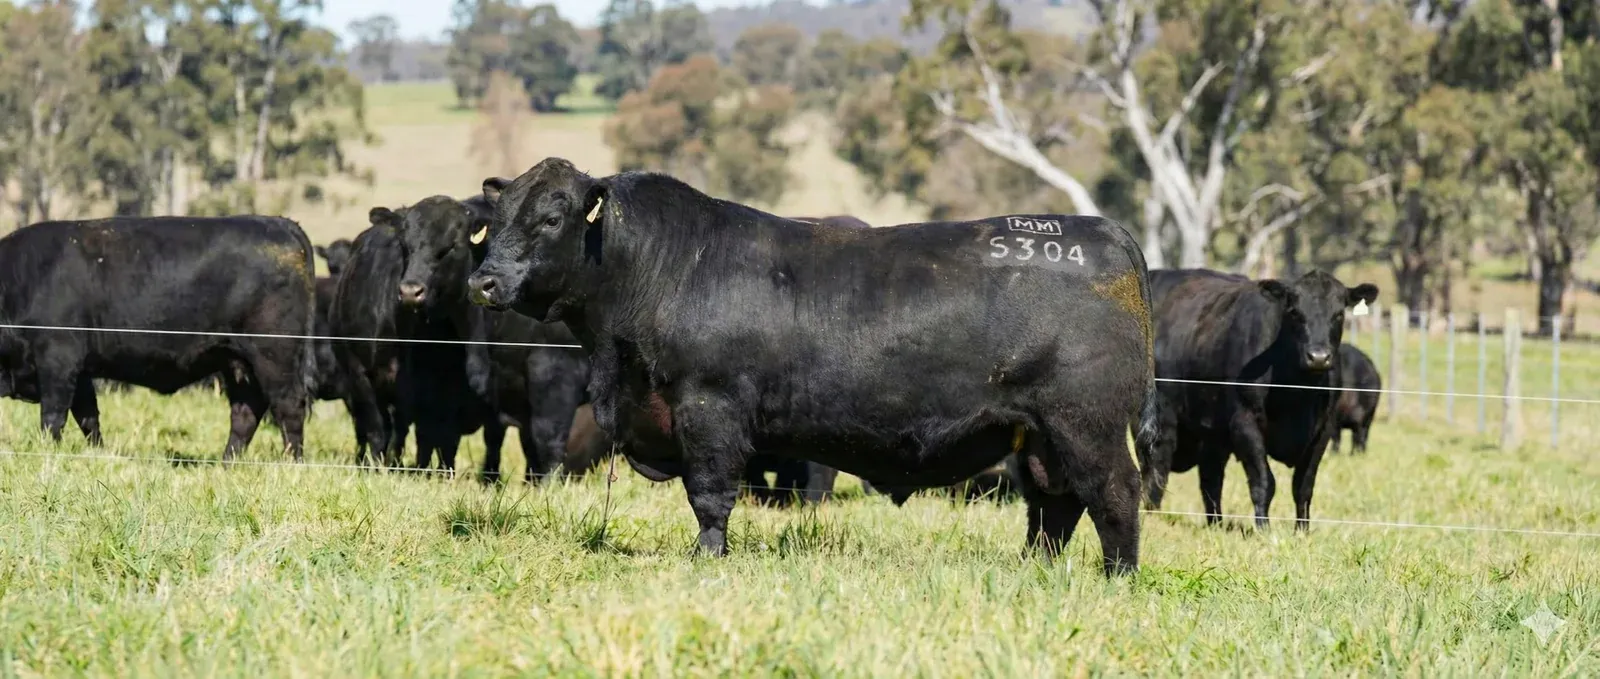
 Mob shots and group photos are powerful marketing assets - they show consistency, depth of program, and the environment your genetics are bred for.
The Bottom Line
You don’t need professional gear to dramatically improve your livestock photography. You need good light, correct angles, a steady hand, and the willingness to crouch down to the animal’s level instead of shooting from standing height.
Hire a professional for your catalogue - that investment pays for itself many times over. But for the other 95% of photos and videos you take throughout the year, these fundamentals will elevate your content from forgettable snapshots to images that genuinely showcase your genetics.
Good photography is good marketing. And good marketing is what gets the right buyers looking at the right animals.
When It’s Time to Hire a Professional
For sale catalogues, sire promotion, and key marketing material, there’s no substitute for a professional livestock photographer who understands the industry. They know how to handle animals on the day, read the light, and deliver images that do your genetics justice. If you’re looking for someone who specialises in livestock and agricultural photography, we’d recommend checking out OGA Creative - they understand stud stock and consistently produce the kind of imagery that sells animals.
Ready to put your photos to work?
Frisbee lets you attach photos and videos directly to animal records, build sale catalogues with professional media, and send visual marketing campaigns to your buyer database - all from one platform.
Book a Free Demo to see how Frisbee keeps your photos connected to your data.
Related reading:
Tagged
Run a sharper stud, on one platform.
Genetics, sales, clients and marketing — without the spreadsheet sprawl. Built for Australian cattle and sheep producers.
Get started with FrisbeeKeep reading
View all →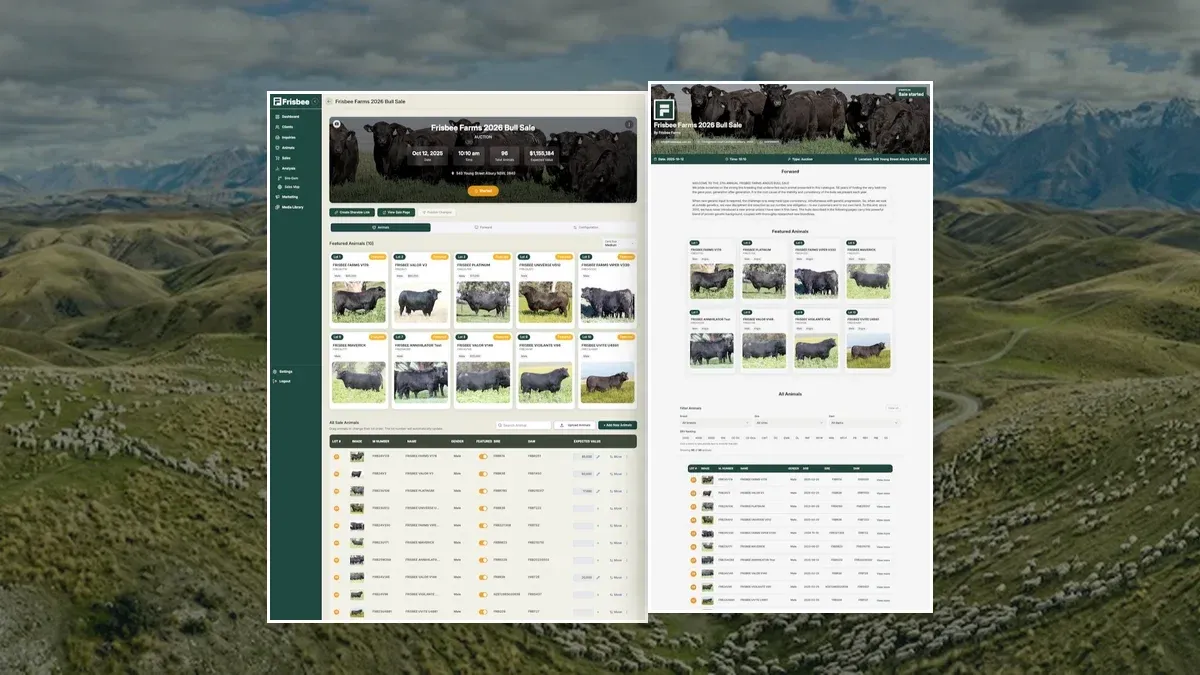
Build a Digital Sale Catalogue That Sells: A 2026 Guide
Sale season is approaching and your catalogue is your most important marketing asset. This guide covers why digital catalogues outperform PDFs and print, what makes a catalogue convert browsers into bidders, and how to build one that does your genetics justice.
The Anatomy of a High-Converting Sale Announcement Email
Learn how to craft sale announcement emails that livestock buyers actually open and act on. From subject line formulas to a ready-to-use template, this guide takes your sale marketing from generic to effective.
Your Cattle Are World-Class. Your Marketing Should Be Too.
You've done the hard work breeding superior livestock. But in a crowded market, how do you ensure the right buyers see them? Frisbee's Marketing Campaign Management brings professional-grade email marketing directly into your livestock software.